Getting Started - Tutorial
Requirements
 See also: First Steps
The tutorials listed here use the aTeVaL board from the Starterkit-Luna of eHaJo. Of course, you can also run the examples on other boards or a breadboard. The necessary steps from creating the program until transfer to the controller are similar. Different assignments of, for example LEDs, must then be adjusted accordingly.
The structure or the soldering guide is in aTeVaL-Board Wiki explained in detail.
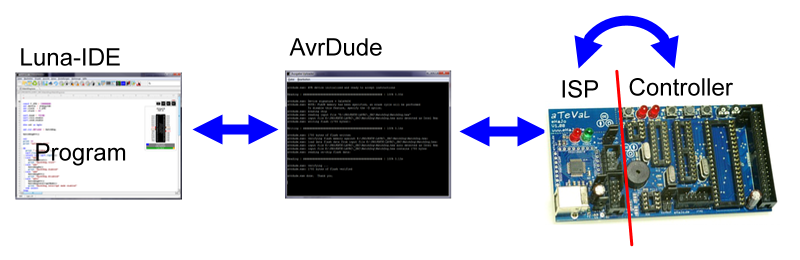
The aTeVaL contains a ISP, with which you can transfer the ready-compiled program on the Atmel controller. The aTeVaL this supports the original Atmel Studio or programming with avrdude. The Luna-IDE uses avrdude as transfer software, so must aTeVaL previously be changed once to the "avrdude mode".
After soldering
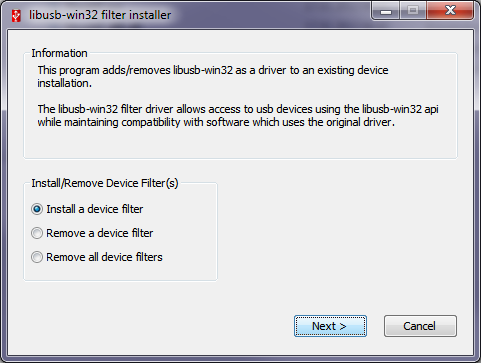
After the solder together the aTeVaL you close it via USB to the computer and switches described in the avrdude-mode like the link above. For example, Windows7/8/Vista the drivers automatically installed and there is a new device called „AVRISP mkII“. For communication via the USB interface is „libusb“ is required. Using the example for Windows, the installation sequence:
- libusb-win download, unpack archive download links below Programmer/Uploader
- Switch to the directory bin/x86/.
- Execute the program install-filter-win.exe.
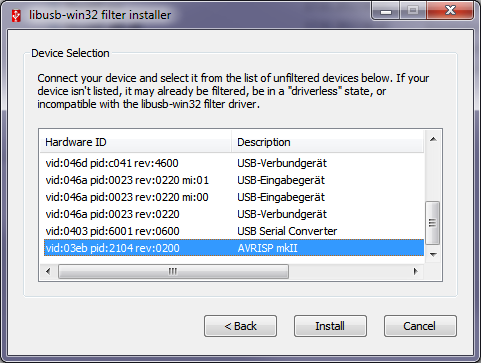
- Install Drivers for „AVRISP mkII“:
Change the interface in the Luna IDE at Settings/uploader to „usb“, and the programmer to „AVRISPMKII - Atmel AVR ISP mkII“. Then everything is ready for the Luna IDE access pass to the microcontroller. For the examples/tutorials below we use the controller „atmega328P“ from the starter kit.
Communication
Tutorials
Program Examples
The following program examples are analogous to the C examples from aTeVaL-Wiki.
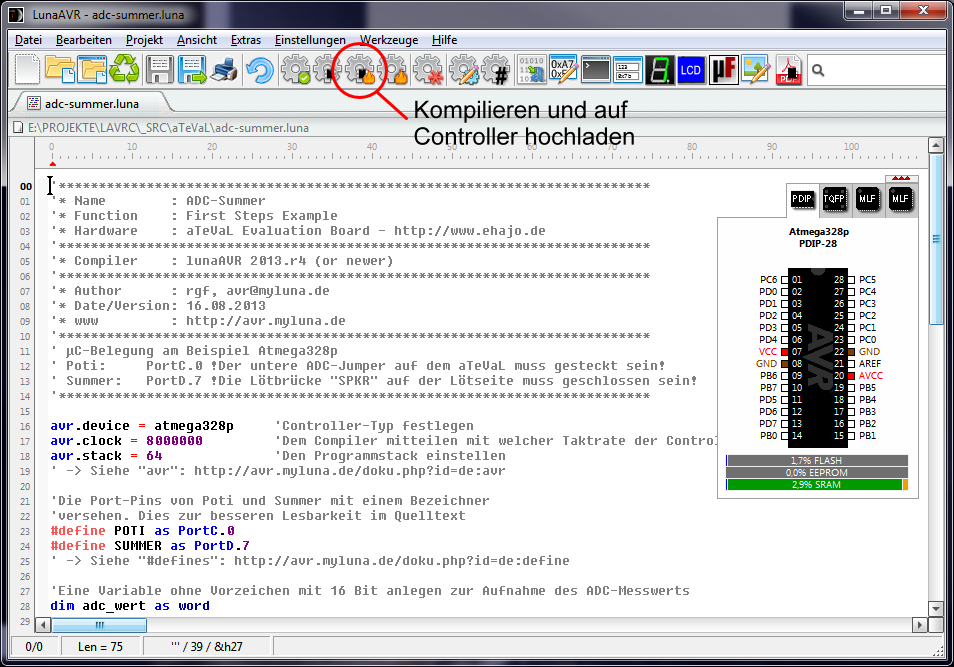
After loading one of the examples, it can compile and upload to the controller with the button or the menu item „compile and upload to the microcontroller“. Following the compiled example is executed directly on the controller.